How does the wearable work?
The wearable is operated with a single button and gives feedback through an LED and a buzzer (vibration). It measures your posture and gives a vibration signal when you move or sit in a way that puts strain on your back.
Depending on what is registered, you get a different vibration signal:
- Risk movement (bending or overextending): a strong, short vibration.
- Risk posture (staying bent over): a subtle, repeating vibration pattern that keeps coming back until you correct your posture (return to the green zone).
Getting started: take the wearables out of the Pro Kit (this switches them on), attach them, calibrate, and get to work. The steps below explain each part.
How do you attach the wearables?
Step-by-step: attaching the wearables
These wearables must always be attached:
- Collar wearable
- Belt wearable
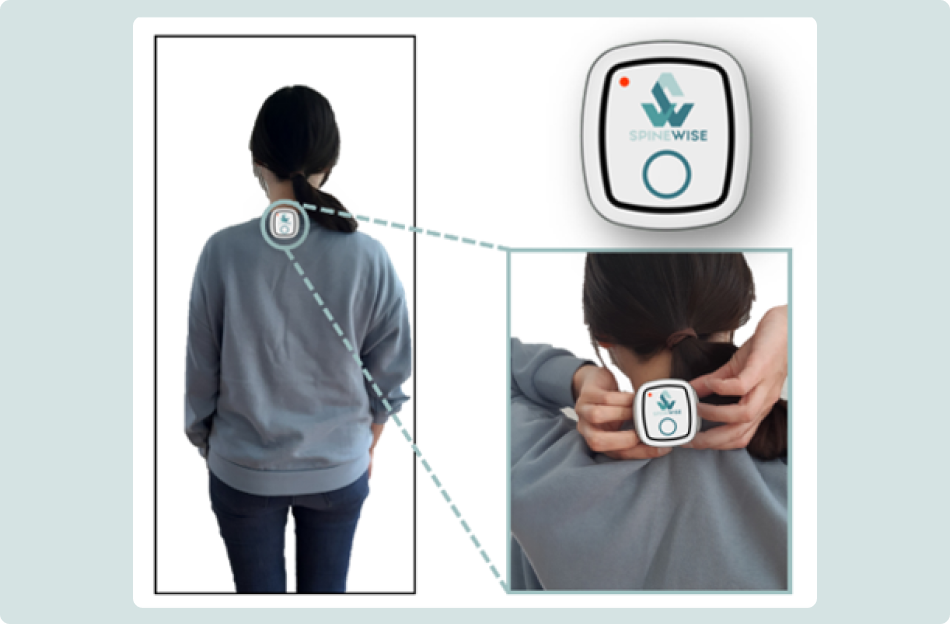
Step 1: Attaching the collar wearable
- Place it on the bottom layer of clothing
- Wear the collar wearable on a T-shirt or other bottom layer, with a sweater, pullover or cardigan over it.
- This gives more stability during the measurement.
- Check contact with the back
- Make sure the wearable keeps contact with the back, also when you raise your arms.
- Insert it deep enough
- Slide the clip fully over the edge of the clothing so the wearable cannot fall off while moving.
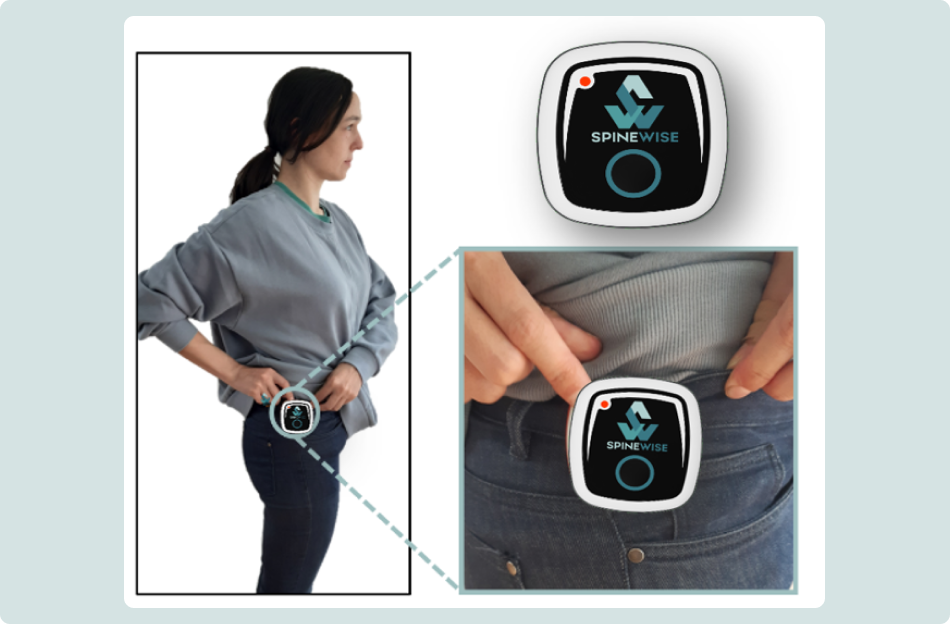
Step 2: Attaching the belt wearable
- Attach it to a sturdy edge
- Place the wearable over your belt or a sturdy waistband.
- Press the clip fully over the belt so it does not slide up.
- Avoid flexible fabric
- Do not attach the wearable to thin or stretchy fabric. Use an extra strap if needed to prevent it from shifting.
- Always place it on the right-hand side
- Attach the wearable to the right trouser edge, as far to the side as possible (at the height of the trouser seam).
- Placing it on the left, or too far forward, can cause incorrect measurements.
- Avoid wrong positions
- Not on trousers that hang too low.
- Not on the pocket, as this moves with the hip and disturbs the measurements.
- Check the height
- Raise a knee: if the wearable moves with the upper leg, it is sitting too low and must be placed higher.
Points of attention (attachment)
- Wear the collar wearable on the bottom layer of your work clothing.
- Make sure the collar wearable always keeps contact with your back.
- The belt wearable must always be attached on the right-hand side.
- Wear the belt wearable at hip height.
How do you calibrate the wearables?
Step-by-step: calibrating the belt wearable
The purpose of calibration is to capture your neutral posture. Follow the steps below to calibrate the belt wearable correctly.
Before you start
- Briefly press the button on both the collar and the belt wearable and check that both flash green (connected). If one flashes red, they are not connected yet. See Troubleshooting below.
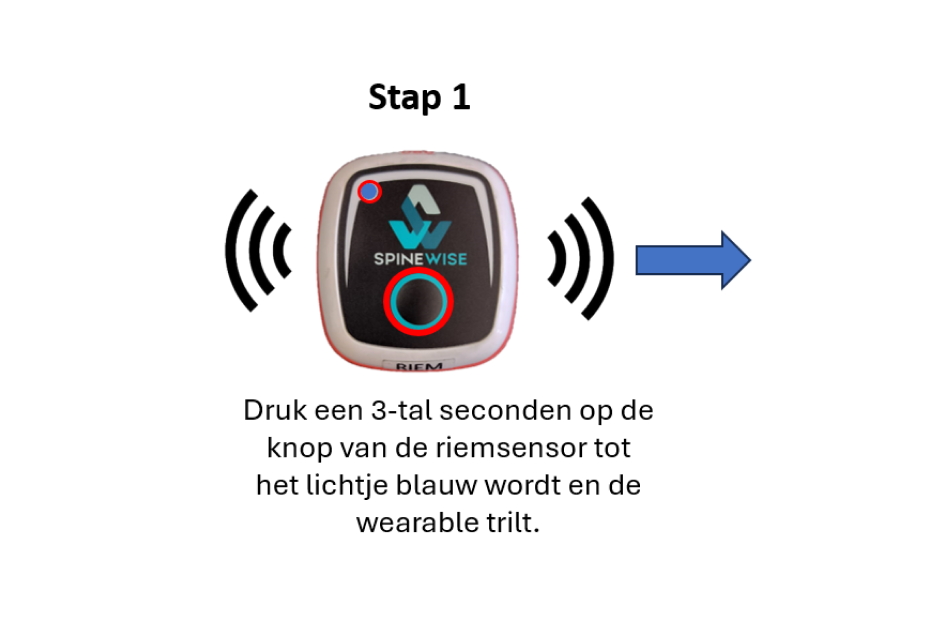
Step 1: Start the calibration
- Hold the button on the belt wearable until it vibrates and the LED turns blue (about 3 seconds).
- Release the button as soon as the LED is blue. If you keep holding until the LED turns red (about 5 seconds), the wearable switches off instead of calibrating.
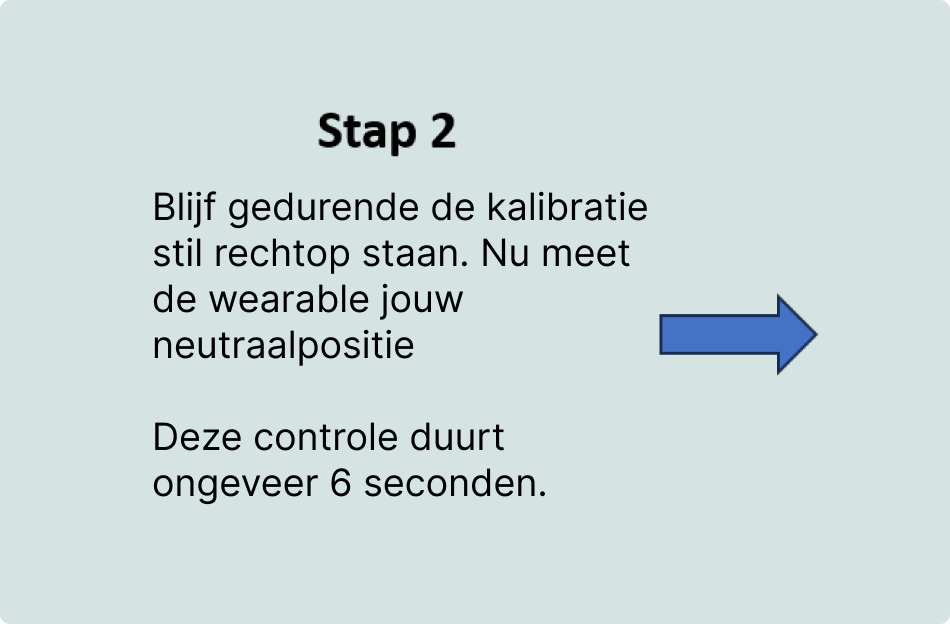
Step 2: Calibrating
- Stand still in a natural, relaxed posture during the calibration, without forcing an exaggerated upright stance. The wearable now measures your neutral posture.
- This check takes about 6 seconds.
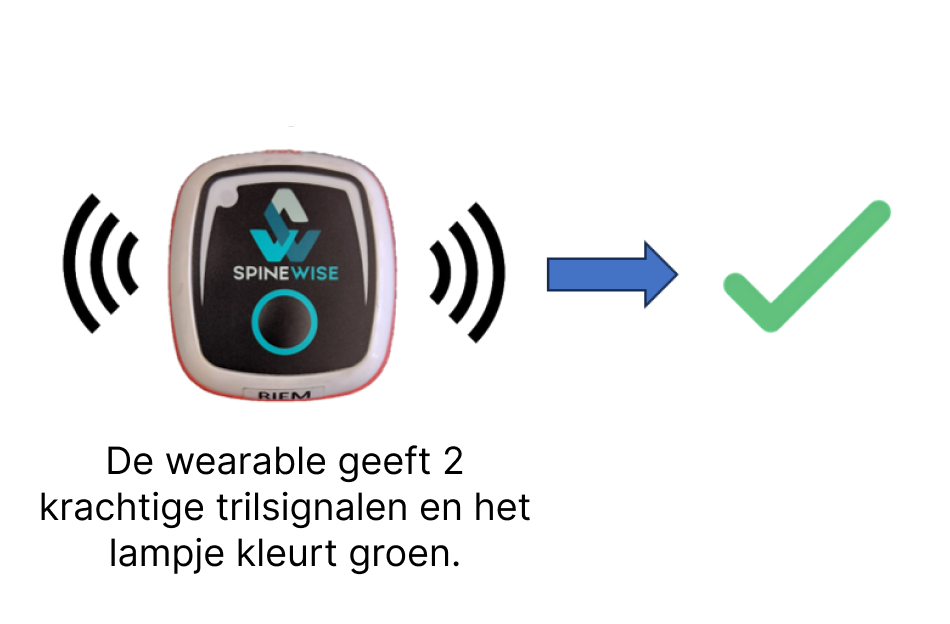
Step 3: Confirmation
- Successful calibration:
- The wearable vibrates twice, firmly.
- The LED lights up green for 30 seconds. You can now start working.
- Failed calibration:
- Wait until you feel two vibration signals. If this takes too long, it may be because you are not standing still enough.
Points of attention (calibration)
- Release the button as soon as the LED turns blue. If you keep holding until it turns red (about 5 seconds), the wearable switches off.
- Calibration applies only to the belt wearable and is not needed for the collar wearable.
- Stand in a natural, relaxed posture during calibration, without overcorrecting.
Operating the wearable
The wearable is operated with a single button and gives feedback through an LED and a buzzer (vibration).
Overview of controls, signals and charging
Button actions
- Single press: show status
- Long press (3 s): start calibration
- Long press (5 s): switch off
- Triple press: pause feedback (30 min; toggles on/off in office mode)
Status LED meanings
- Solid green: connected and calibrated
- Two short green flashes: not calibrated, ready for use
- Blue: corrective vibration (bending or overextending)
- Breathing blue: feedback paused (silent mode)
- Breathing green (on the charger): charging
- Solid green (on the charger): fully charged
- Red flashes: error (see Troubleshooting)
Pausing the feedback (silent mode)
A triple press pauses the corrective vibration. In most setups this is a 30-minute pause: the feedback turns back on by itself after 30 minutes (or triple-press again to resume sooner). In office mode, a triple press toggles the feedback on and off until you change it again. While paused, the buzzer is off and the blue LED breathes slowly.
Switching off
Hold the button for about 5 seconds, past the single calibration buzz. Release when you feel fast, repeated buzzing and the red LED flashes.
The wearable also switches itself off after a period of inactivity to save the battery. Press the button or place it in the Pro Kit to switch it on again.
Charging & battery
Charge the wearable with the USB-C cable or place it in the Pro Kit. While charging, the LED breathes green; once fully charged it stays solid green. When the battery is almost empty, the wearable buzzes rapidly and flashes red for a few seconds, then switches off.
Troubleshooting
The LED can flash red for several reasons:
- The wearables are too far apart.
- The battery is empty.
- A collar or belt wearable from another set is being used (e.g. collar 3 and belt 4).